
Custom shape keys
Want to give a custom shape to your humans and save it to reuse later? For example, want to add a slider for elf ears? This guide shows how to make your sliders show up in one of these places:
- Body sliders
- Face sliders
- Face presets
- 1-click expressions
- Hidden sliders (for scripts)
1) How to make a shape key
If you want to save your edits or sculpts, always make sure you do them on a new shape key. Otherwise HG can't save them.
Select the body object, and go to the "Shape Keys" section of the "Object Data" tab.
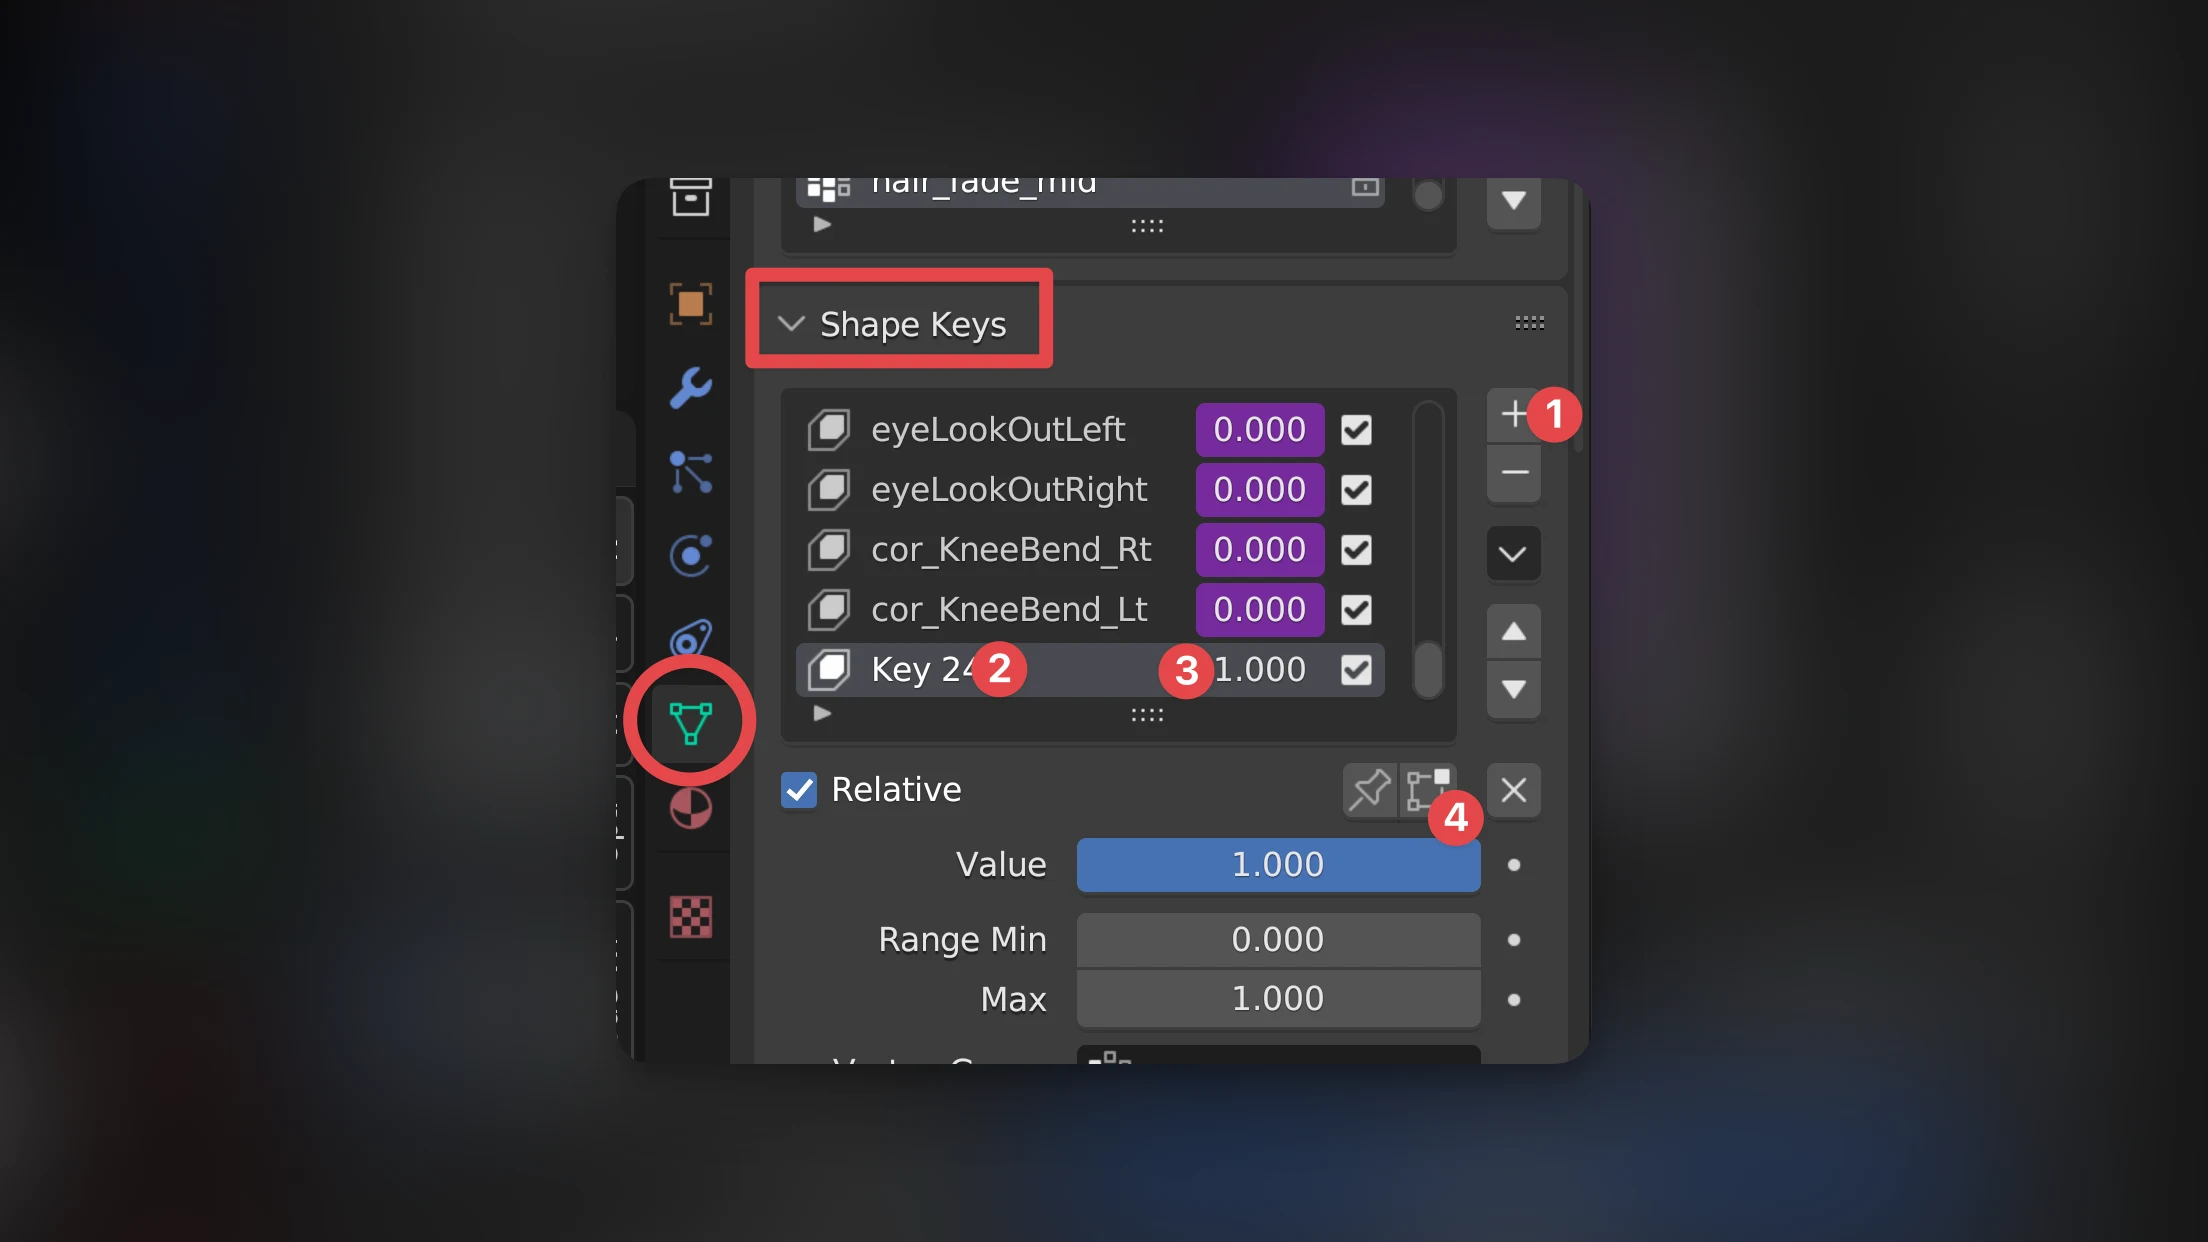
- Add shape key: Press this button to add a new shape key
- Rename shape key: Give the shape key a clear and descriptive name. This is the name that will show up as the slider name in HG
- Value: Set the value of the slider to 1.0, otherwise you will not see your edits..
- Edit mode toggle: If you want to edit your shape key while still seeing the effect of all the other keys, enable this button. (For example the male shape is also a shape key on top of a female base mesh. If you don't enable this, you will see the female base mesh while editing your shape key, which might not be what you want)
Now perform your edits. You can use edit mode, proportional editing, or sculpting. Here we use sculpting with symmetry turned on.
Always make sure that the shape key you created is selected (visible by the light grey bar below it) in the "Shape Key" section. Otherwise you're making edits on another key.
For a more complete view on how shape keys work on how to create them, Alex Lashko (the co-creator of Human Generator) has made the following video tutorial:
2) Go to the "Custom Content" tab
The switch is located at the top of the Human Generator interface. NOTE: Make sure the human who's shape key you want to save is the active object.
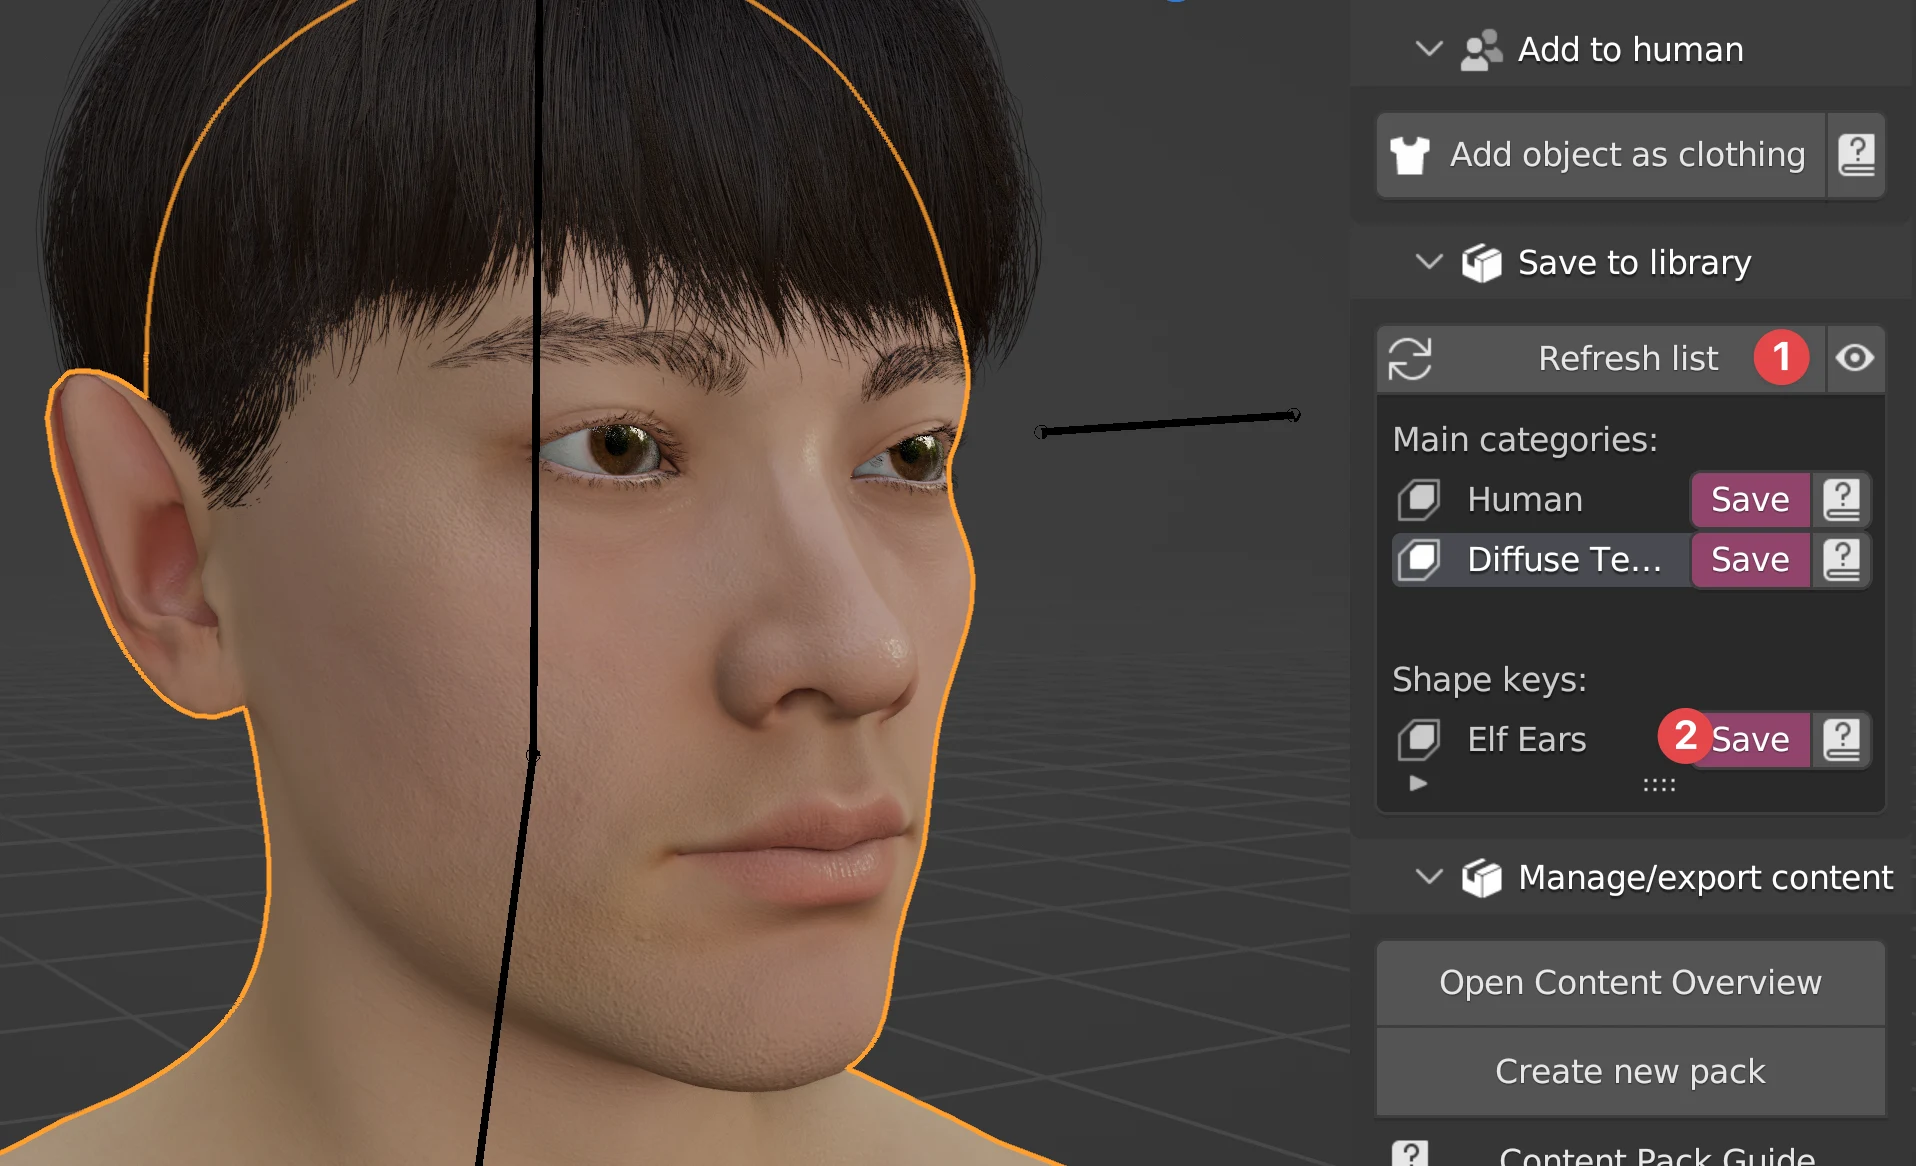
Always press "Refresh list" (1) before saving shape keys
You should see the custom shape key you created in the list of "Save to library". Press Save (2) next to the shape key you want to save.
3) Choose a category
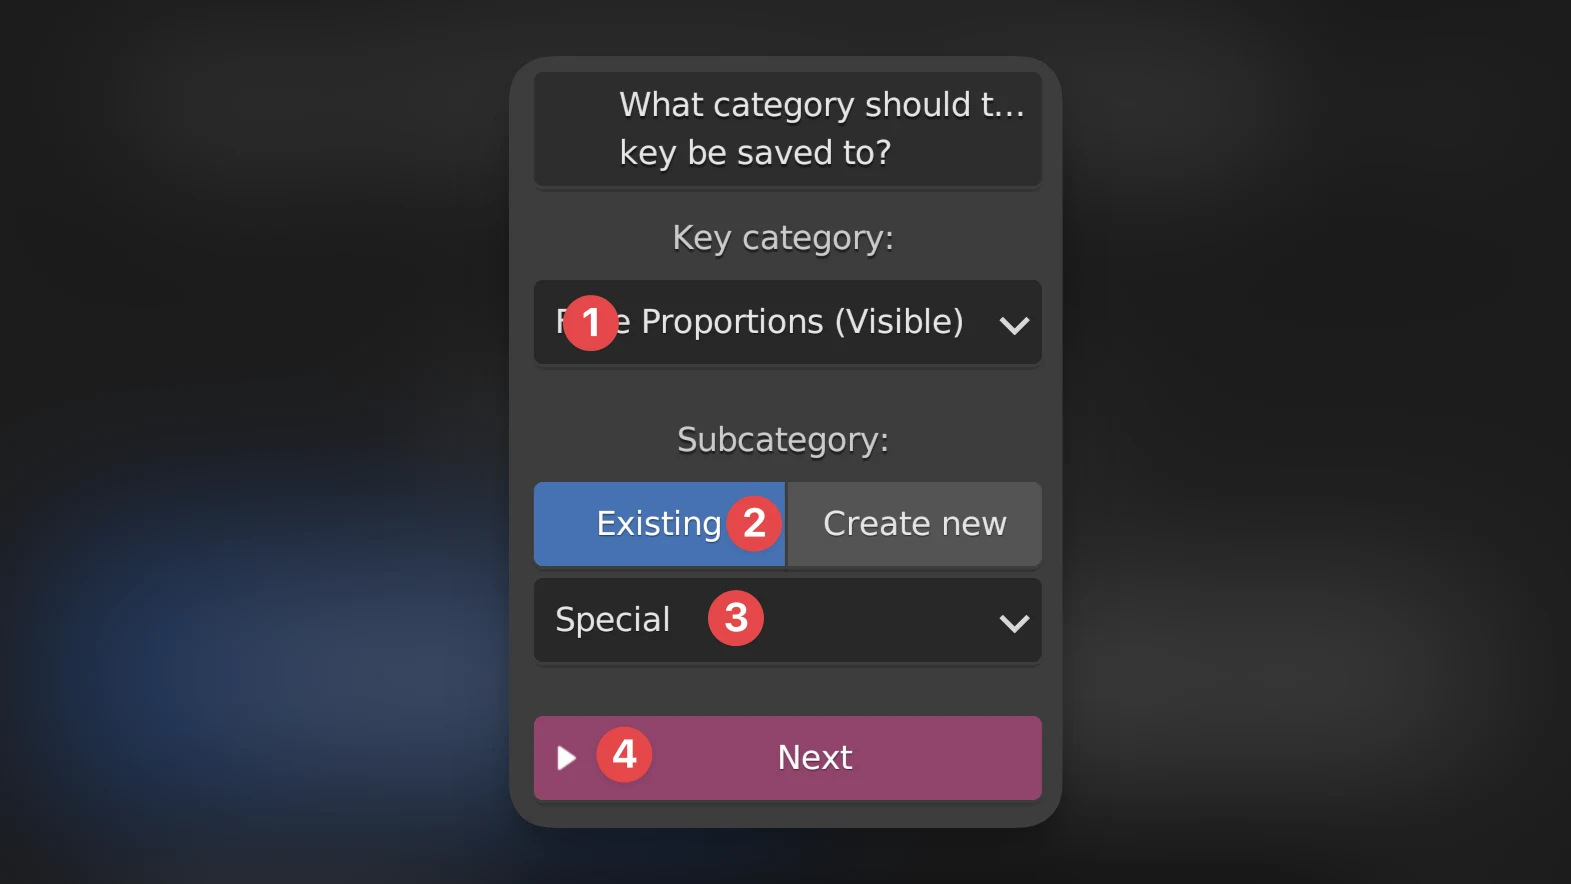
First you can choose what type of key this is in the dropdown (1). This is what the categories mean:
- Body Proportions: Keys saved here will show as sliders in the "Body" tab of Human Generator.
- Face Proportions: Keys saved in this category will show up in the "Face" tab of Human Generator as sliders.
- Face presets: These will also show as sliders in the "Face" tab, but are not meant to be used directly by users. If you're making a shape key that will only be used as part of a starting human, save it here.
- Expressions: These will show up as 1-click expression items in the "Expressions" tab.
- Special: These won't show up anywhere. For example the height system of HG uses special keys. These keys are only accessible using the Python API.
For each of these types, you can choose a subcategory. For example for body proportions you can choose "Main" (they show up at the top), "Muscles", "Torso", etc. You can also create a new category by switching to "Create new" (2) and giving a custom name.
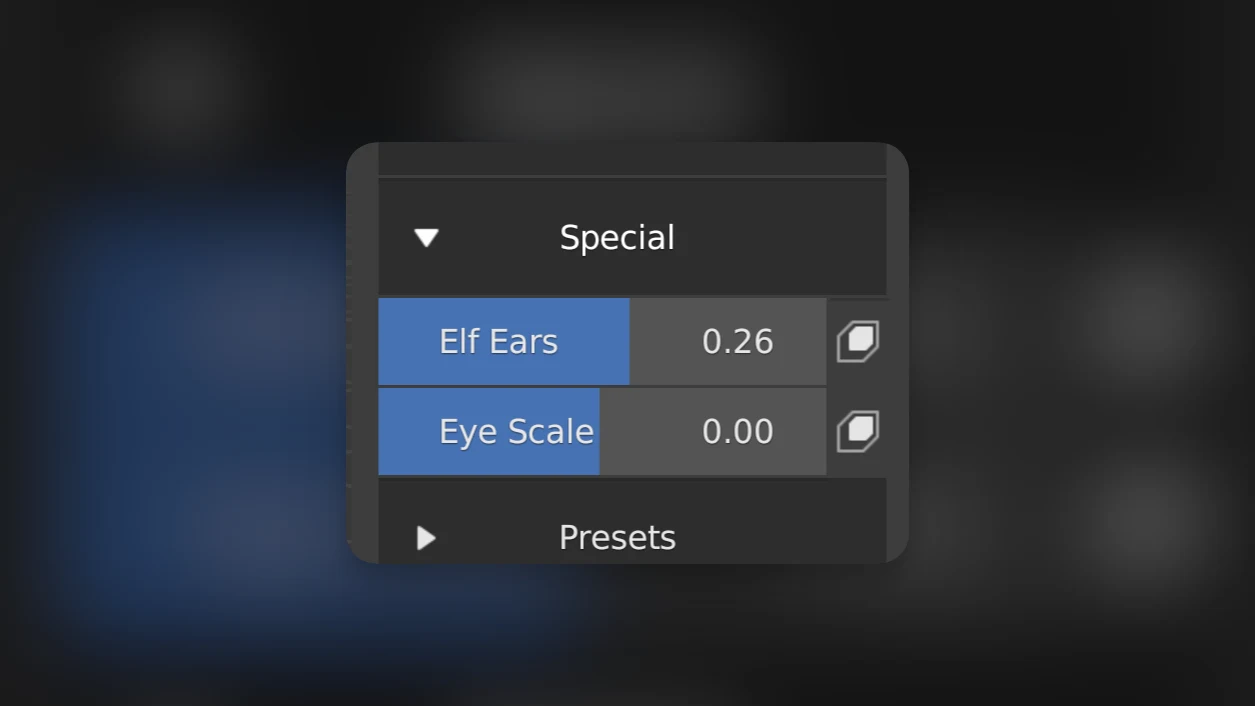
Are you making a shape key that should not be included when people press "Randomize"? (For example elf ears are non-human features, so we don't want them to show up when people press randomize). Then choose the Special subcategory, as these are not included in randomization. (Not to be confused with the "Special (hidden)" key category)
4) Choose a name
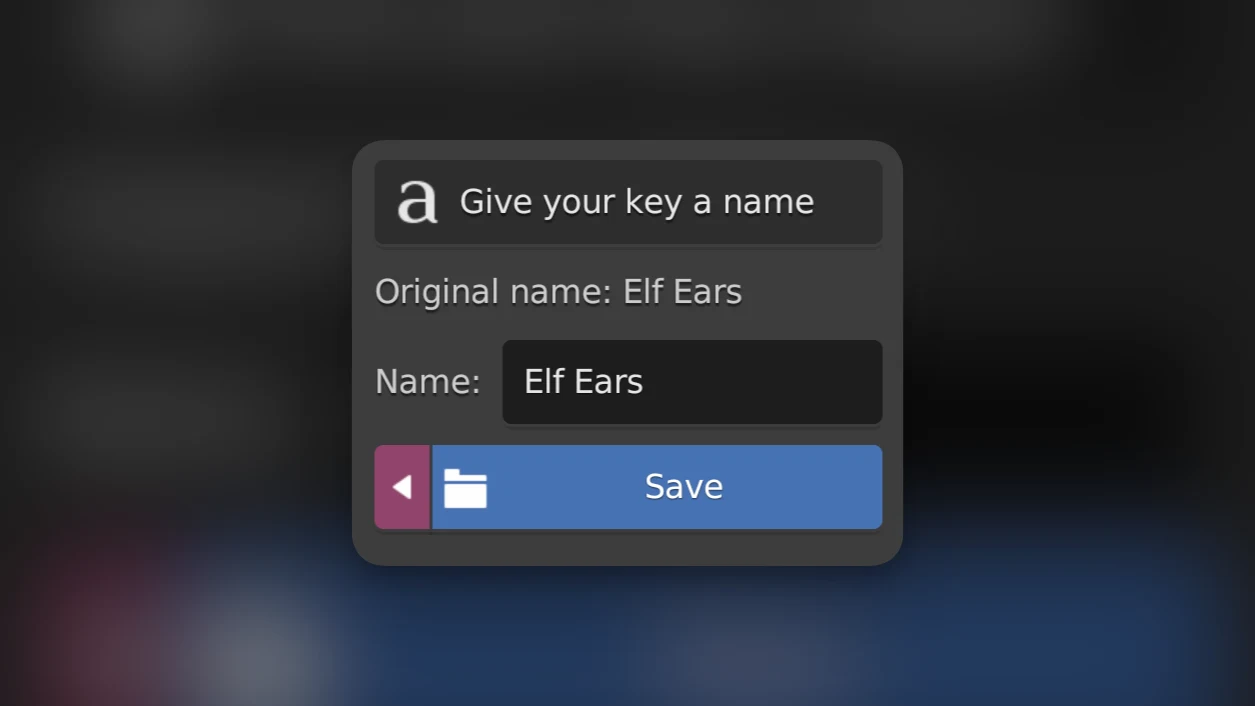
This name will show up as the slider name and will be used as filename. Then press Save.
5) Your shape key is now saved!
It will be available on any new human you create.
HG saves almost all shape keys as "Live Keys" which are separate files on your disk instead of shape keys on the model. When you've just saved your shape key as live key, the old shape key will still be on your object. If the live key has been save succesfully (which you can test by moving the slider) you can safely delete your shape key from your model.
Shape keys are saved in .npz files, no matter if they are saved as shape key or as live key. If they are a shape key they are in the {hg folder}/shapekeys/{key type}/{subcategory}/ folder and as live key in the {hg folder}/livekeys/{key type}/{subcategory}/ folder.
How is the .npz structured? It contains the indices of the vertices that the key consists of and the vector deformations of each of those vertices flattened into a 1D array.
indices.npy
[[0, 1, 2, 3, 4, 5, 6, 7, 8, 9, 10, 11, 12, 13, etc.]
relative_coordinates.npy
[0.0006380937993526459, 0.007638104259967804, -0.005018115043640137, 0.0010991264134645462, etc]
Shape keys (only for expressions or when the user clicks on "convert to shape key") are loaded by converting this information into a typical Blender shape key.
Live keys are loaded on demand into the LIVE_KEY_TEMP shape key. As soon as the user clicks or starts sliding a live key slider, the live key data is loaded into the temporary shape key. While sliding, the user is adjusting LIVE_KEY_TEMP. When sliding another live key, the previous LIVE_KEY_TEMP is added to LIVE_KEY_PERMANENT.
While the user is sliding a live key, the eye and teeth objects as well as the rig are hidden. As soon as the user lets go of the slider, the positions of the eye and teeth objects are calculated based on the new geometry and the bone positions in the rig get updated.